Editing Decisions users
We have had a number of questions recently about amending the names of users in Decisions. This looks a little different for folk using XI R3.2 and those using XI R2 versions, but the principles are much the same. Here is the procedure illustrated in XI R3.1: but first a very important distinction –
- A User is in effect an individual log on/password combination regardless of who uses it. Most Decisions users have a “named licence” arrangement which means that each log on and password should be for the exclusive use of one individual (i.e. not shared)
- A Group in Decisions is merely a collection of permissions to which one or more users (and or sub-groups) can be linked, so for example individual named users Sally, John and Joe might all be linked to the same Web Intelligence Groups that defined their permissions. There is no such thing as a log on and password for a Decisions Group. It is more like a domain or category
User names can be changed. The process is as follows:
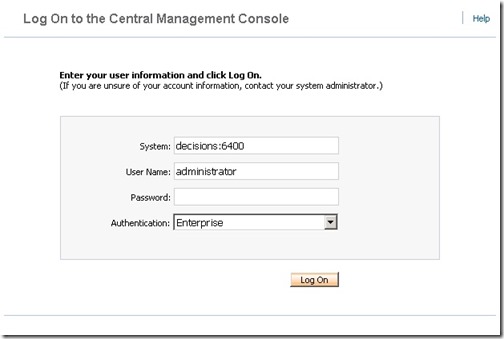
Log on to the Central Management Console as a user with administrative privileges:
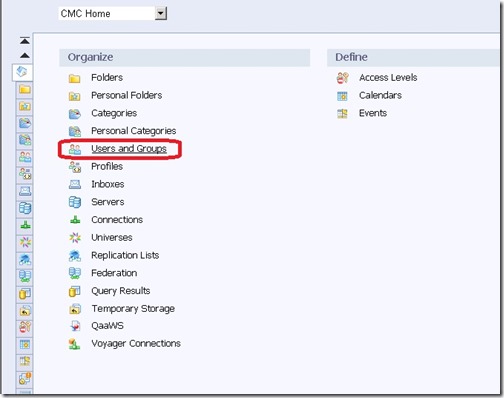
Select Users and Groups:
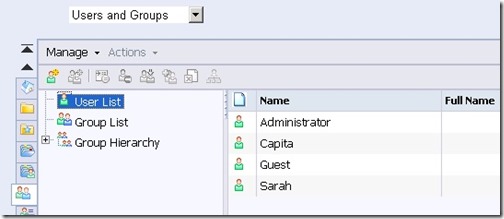
Then select User list:
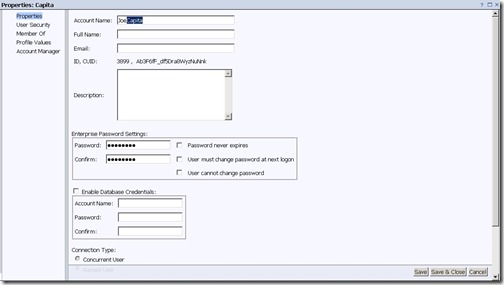
Suppose in this example that we wanted to change the name of the user “Capita” to “Joe” to make its ownership clearer. Simply Double click the user Capita, edit the name to read Joe, adjust anything else you wish like password and password rules, then Save and Close:
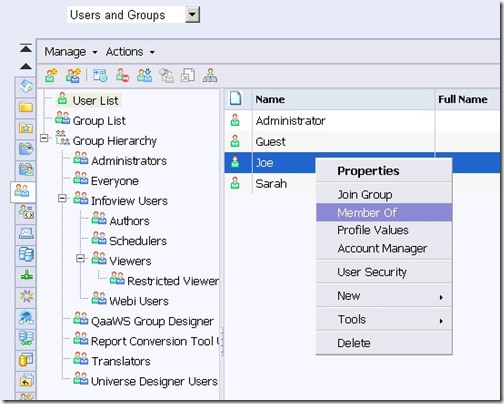
Changing the name of a user in this way will not change their links to (permission) Groups and any items in their Inbox will remain the same; but if you wished to check group membership, right click the user and select Member of (or if still displaying the edit dialogue select Member of in the left palette)
Different libraries will have different group structures, and note that users can belong to multiple Groups.
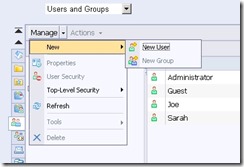
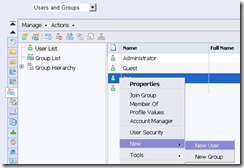
You can create new users either from the Manage drop down in the Users and Groups area, or by right clicking and selecting New User:
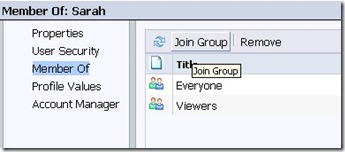
Setting up user permissions is rather beyond the scope of this post (it is covered in the Administration webinars) but in many cases you can in effect replicate an existing user’s permissions by adding the new user to the same groups using the Join Group menu item:
Note however that this may not work as expected if the user has been assigned permissions directly (not very good practice but permitted).
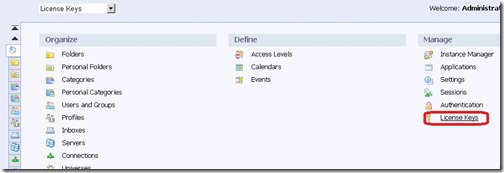
Finally if you want to know how many users your license permit, select the License Keys option in the main menu:
I trust that this is helpful. If you are still struggling feel free to raise a case



Recent Comments